How to Migrate from Mailchimp to MailerLite Without Losing Subscribers

By Vincencia Anyango · Founder & Lead Reviewer
Last updated: September 2026 · 11 min read
Most migration guides stop at the import button. That part takes about five minutes.
Subscribers get lost in the gaps around it. A signup form still pointing at Mailchimp, a domain that was never authenticated, or an account deleted a week too early can quietly cost you readers.
This guide covers the whole move, in order. It is built on MailerLite’s own migration documentation, Mailchimp’s billing rules, and Google’s current sender requirements.
The short answer
You can migrate from Mailchimp to MailerLite in an afternoon, then run both tools side by side for about two weeks. MailerLite’s built-in Mailchimp importer moves your subscribers, custom fields, tags, and basic segments for you.
Automations, email templates, signup forms, and landing pages do not transfer. You rebuild those by hand, and that is where most of your time goes.
- Back up everything in Mailchimp
- Clean your list before you import it
- Tag your most engaged subscribers
- Create your MailerLite account and get approved
- Authenticate your sending domain
- Import with the Mailchimp integration
- Rebuild automations, templates, and forms
- Close the subscriber gap with a final sync
- Warm up with your best subscribers first
- Pause Mailchimp instead of deleting it
Why so many people are switching in 2026
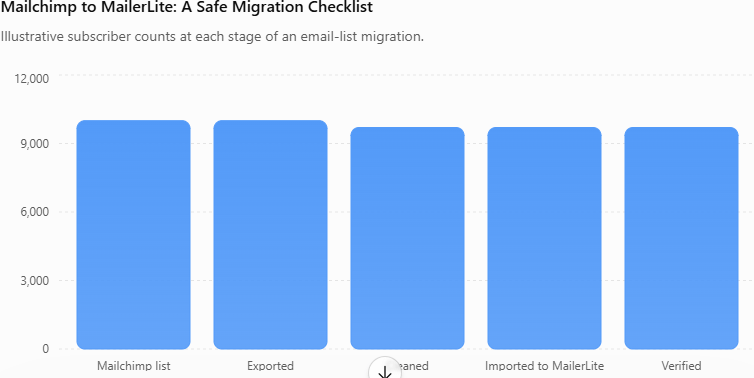
Your list is worth protecting. Litmus puts the average email marketing return at $36 for every $1 spent, and EmailToolTester counts 4.73 billion email users worldwide this year.
For most people, the trigger is the bill. Mailchimp’s own help center confirms that subscribed, unsubscribed, and non-subscribed contacts all count toward your contact total.
MailerLite works differently. Its pricing page says billing is based on active subscribers only, so people who unsubscribed or bounced cost you nothing.
That difference adds up. One 2026 Mailchimp pricing breakdown estimates that 20% to 40% of a long-running Mailchimp list is often dead weight on the bill.
The same analysis gives a simple example. At 10,000 contacts with 2,000 unsubscribed, you pay for the 10,000-contact tier while only 8,000 people can receive your email.
Free plans are no longer a reason to pick either tool. Mailchimp cut its free plan to 250 contacts in January 2026, and MailerLite’s free plan also caps at 250 subscribers.
| Billing rule | Mailchimp | MailerLite |
|---|---|---|
| Subscribed contacts | Counted | Counted |
| Unsubscribed contacts | Counted until archived or deleted | Not counted |
| Non-subscribed contacts | Counted | Only active subscribers are billed |
| Bounced (cleaned) contacts | Not counted | Not counted |
| Same email in two lists | Counted twice across audiences | Counted once across groups |
| Contacts deleted mid-cycle | Peak count in the cycle sets your limit | Still count until your billing date resets |
| Free plan | 250 contacts, 500 emails a month | 250 subscribers, 2,500 emails a month |
| Cheapest paid plan | Essentials from $13 a month | Comfort from $12 a month |
| Nonprofit discount | 15% | 30% |
Prices and limits checked September 2026. Both platforms change pricing often, so confirm on their sites before you buy.
For full plan details, read our MailerLite review and our Mailchimp review. If you are still deciding, our best email marketing software guide compares every major option.
What moves automatically, and what does not
Knowing this upfront saves hours of surprises. MailerLite’s importer connects to your Mailchimp account directly, so you do not need to upload a file.
| What you have in Mailchimp | Moves automatically? | What to do |
|---|---|---|
| Subscribed contacts | Yes | Import with the Mailchimp integration |
| Custom fields | Yes | Let MailerLite map them, then review |
| Tags | Yes, as groups | Choose “Create groups for each list and tag” |
| Basic segments | Yes | Field-based segments only |
| Advanced segments | No | Rebuild behavioral and e-commerce segments |
| Unsubscribed and unconfirmed | Optional | Imported as a record only, cannot receive newsletters |
| Open and click history | No | Export reports and tag engaged subscribers first |
| Automations | No | Rebuild in MailerLite |
| Email templates | No | Rebuild, or reuse HTML from your backup |
| Signup forms and landing pages | No | Recreate, then swap on switch day |
| Signups after your import | No | Click “Sync again” on switch day |
The segment rule catches a lot of people. MailerLite’s migration guide explains that only simple, field-based segments carry over, while behavioral, e-commerce, and activity-based segments must be rebuilt.
Step 1: Back up everything in Mailchimp
Do this first, even though the importer does the heavy lifting. A deleted Mailchimp account cannot be restored.
Mailchimp’s full account export includes your audiences, campaign content, reports, templates, and stored images. Audience files come split into subscribed, unsubscribed, non-subscribed, and cleaned contacts.
Save these three things somewhere safe:
- Audience exports: your full contact history and a record of who opted in.
- Campaign reports: open and click benchmarks to compare against after the move.
- Templates and images: the HTML and files you will copy designs from.
Contact exports only stay in your account for 30 days, according to Mailchimp’s export guide. Download them straight away.
Step 2: Clean your list before you import
This step saves money from day one. MailerLite counts any address that was active at any point in your billing cycle, even if you delete it later.
So if you import junk and delete it afterward, you still pay for it that month. Clean first, import second.
Inside Mailchimp, deal with three groups:
- Cleaned contacts: these are hard bounces. Leave them behind.
- Non-subscribed contacts: people who bought or interacted but never opted in to marketing. Do not import them as active subscribers.
- Duplicates across audiences: Mailchimp counts the same email twice if it sits in two audiences. MailerLite counts duplicates across groups only once, so merging is safe.
Think carefully about long-inactive subscribers too. Consider running a last re-engagement email in Mailchimp, then leaving out anyone who still ignores you.
Step 3: Tag your most engaged subscribers
Here is a step most guides miss. Your open and click history stays behind in Mailchimp, but your tags come with you.
Before you import, build a segment of subscribers who opened or clicked in the last 90 days, then tag them all “engaged-90d.” MailerLite turns every Mailchimp tag into a group, so you arrive with a ready-made list of your best readers.
You will use this group in Step 9.
Step 4: Create your MailerLite account and get approved
MailerLite reviews every new account before it lets you send. One 2026 review notes this usually takes a few hours, but incomplete profiles can wait much longer.
Give the reviewers what they need:
- Sign up with a domain email address. MailerLite places limits on Gmail and other free addresses.
- Make sure your website is live and clearly shows what your emails are about.
- Answer the setup questions honestly, especially how you collect subscribers.
Pick your plan before you import. On the free plan, sending locks once you pass 250 active subscribers, so most migrating lists need Comfort (from $12 a month) or Power (from $25 a month).
Every new account also gets a 14-day trial of premium features. Plan your rebuild in Step 7 to happen inside that window.
Step 5: Authenticate your sending domain
Do not leave this until after your first send. MailerLite’s own guide tells you to authenticate your domain before you test anything.
Mailbox providers now enforce the rules. Google’s sender guidelines require bulk senders to keep spam rates below 0.30%, and its sender FAQ recommends staying under 0.1%.
Google also expects SPF, DKIM, and DMARC alignment, plus one-click unsubscribe for marketing email. Most email platforms handle the unsubscribe part, but the DNS records on your domain are your job.
In MailerLite, open domain authentication and add the records it gives you at your domain registrar or host. If your domain already has an SPF record, add MailerLite to that record, because a domain can only have one.
Then set up free Google Postmaster Tools. It shows your real spam rate once you start sending from MailerLite.
Step 6: Import with the Mailchimp integration
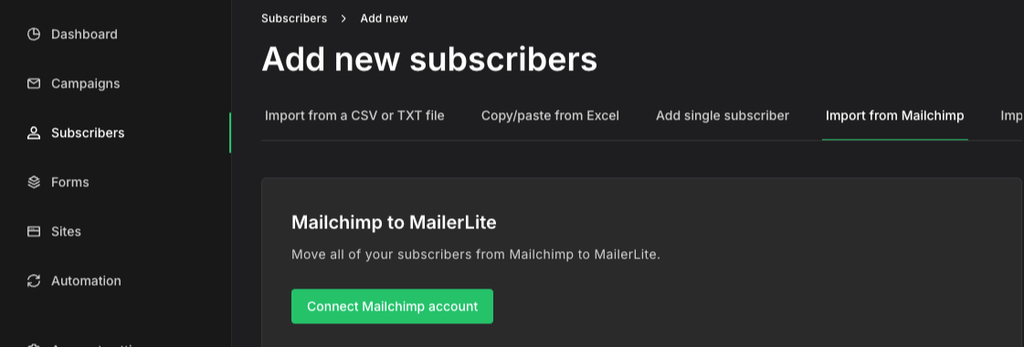
Now for the quick part. In MailerLite, go to Subscribers, click Add subscribers, and open the Import from Mailchimp tab.
You can connect by logging in to Mailchimp or by pasting an API key. Then work through each import screen using these settings.
| Import screen | Pick this | Why |
|---|---|---|
| Select subscriber lists | Only the lists you still email | Old lists add cost and risk |
| Mapping option | Map the fields for me, then review | Keep the opt-in IP field as proof of consent |
| Group setup | Create groups for each list and tag | Brings your “engaged-90d” tag across |
| Segment migration | Bring over all possible segments | Saves rebuilding the simple ones |
| Additional statuses | Tick Unsubscribed | Keeps a record of who opted out, at no extra cost |
| Duplicate subscribers | Update missing info only | “Overwrite all fields” erases data when import fields are empty |
When the import finishes, MailerLite shows how many subscribers were added, updated, and not added. Compare the added number with your cleaned subscribed count in Mailchimp.
A small difference is normal. A big one means something went wrong, so check the not added list before you go any further.
Step 7: Rebuild automations, templates, and forms
This is the slow part. Budget more time here than anywhere else.
Automations
Start with the automation that matters most, usually your welcome sequence. MailerLite’s automation templates give you a head start.
Check the plan limits as you build. Comfort allows 50 active automations and Power has no cap, while the free plan allows 3 automations with up to 5 steps each.
Build everything, but leave it switched off. You turn your automations on during Step 8.
Email templates
Rebuild your main newsletter layout in MailerLite’s drag and drop editor. If you are comfortable with code, the custom HTML editor lets you reuse the HTML from your Mailchimp backup.
Send test emails to yourself on both mobile and desktop. Check the logo, links, and footer before you move on.
Signup forms and landing pages
List every place a Mailchimp form lives before you build anything. Website embeds, pop-ups, link-in-bio pages, and Mailchimp-hosted landing pages are easy to forget.
Recreate each one in MailerLite under Forms or Sites, but keep them unpublished for now. On WordPress, MailerLite has an official WordPress integration for embedding forms.
Where forms hide on WordPress: Check your footer, sidebar widgets, pop-up plugins, and any page builder templates, not just your posts and pages.
Step 8: Close the subscriber gap
This is the step that actually protects your list. Between your import and your form switch, people keep signing up in Mailchimp.
MailerLite’s guide confirms those new signups do not copy across on their own. The fix is a final sync on switch day.
Switch day, in one sitting and in this order:
- Swap every signup form from Mailchimp to MailerLite.
- Pause your Mailchimp automations so nobody gets two welcome emails.
- Run a final sync: go to Subscribers, open Import from Mailchimp, and click Sync again.
- Switch on your MailerLite automations.
- Submit a test signup on every form using a spare email address.
Watch for unsubscribes during the overlap too. After the sync, compare your latest Mailchimp unsubscribe export with MailerLite and unsubscribe any address that slipped through.
Step 9: Warm up with your best subscribers first
A new platform means new sending infrastructure. Your first campaigns shape how Gmail and other providers judge you, so start with people who actually want your email.
Send your first one or two campaigns to the “engaged-90d” group from Step 3. Widen to your full list once opens look normal and your spam rate in Postmaster Tools stays low.
A short note in that first email can help. Tell readers nothing changes for them, and ask them to add your address to their contacts.
Step 10: Pause Mailchimp instead of deleting it
Do not delete your Mailchimp account on switch day. Mailchimp’s help center is clear that deleted accounts cannot be restored, and all audience, campaign archive, and report data is removed.
Pausing is the safer choice. You can pause your marketing plan for 3 or 6 months, keep your data, and stop paying.
Time it for the end of a billing period, since Mailchimp does not refund unused time. Once MailerLite has run cleanly for a full month, take one last backup and decide whether to delete.
A realistic two-week migration timeline
| When | What to do | Steps |
|---|---|---|
| Days 1 and 2 | Back up, clean your list, tag engaged subscribers | 1 to 3 |
| Days 2 and 3 | Create your account, get approved, authenticate your domain | 4 and 5 |
| Day 4 | Import subscribers and check the summary | 6 |
| Days 5 to 11 | Rebuild automations, templates, and forms | 7 |
| Day 12: switch day | Swap forms, final sync, automations on | 8 |
| Days 13 and 14 | First campaign to your engaged group | 9 |
| End of billing period | Pause Mailchimp, keep it paused for at least a month | 10 |
This schedule fits inside MailerLite’s 14-day premium trial, so you can test paid features while you rebuild.
Common mistakes that lose subscribers
- Importing before cleaning, then paying for deleted contacts all month
- Leaving one old Mailchimp form live on a forgotten page
- Sending to the whole list before your domain is authenticated
- Importing non-subscribed contacts as active subscribers
- Running welcome automations on both platforms at the same time
- Deleting Mailchimp before your first month of clean sends
Is MailerLite the right move for you?
For most small businesses, bloggers, and creators, yes. MailerLite prices mainly on list size and sending volume, and it never bills you for people who left.
It is a weaker fit if you depend on Mailchimp’s e-commerce segments or advanced automation. In that case, read our ActiveCampaign vs Mailchimp test, or see how MailerLite compares in MailerLite vs Kit.
Best value Mailchimp alternative
MailerLite
Built-in Mailchimp importer, billing on active subscribers only, and a 14-day trial of premium features with no credit card.Start your MailerLite trial
Frequently asked questions
Will I lose subscribers when I migrate from Mailchimp to MailerLite?How long does it take to migrate from Mailchimp to MailerLite?Do Mailchimp automations transfer to MailerLite?Do unsubscribed contacts transfer to MailerLite?Does MailerLite charge for unsubscribed contacts?Should I delete my Mailchimp account after switching?Does MailerLite offer a nonprofit discount?
Final thoughts
Moving from Mailchimp to MailerLite is mostly a planning job. The import is fast, but the subscribers you keep depend on cleaning first, authenticating early, and closing the gap on switch day.
Work through the 10 steps in order and keep Mailchimp paused until you are sure. For more tools, browse our email marketing reviews or see the best free email marketing tools we tested.
SoftwareStackPro is reader supported. Read our affiliate disclosure to see how we fund our testing.
Free plan up to 10,000 subscribers. 14-day trial of paid plans.

About Vincencia Anyango
IT graduate and freelance web specialist who has built WordPress sites and run email campaigns for clients since 2020. Every review on SoftwareStackPro is based on hands-on testing. More about how I review →